How to add a HTML Signature to Apple Mail
Learn how to add a HTML email signature in Apple Mail that displays consistently across all devices and elevates your email communications.
Last updated: Feb 2026

Prerequisites For Apple Mail HTML Signature Installation:
Before beginning, ensure you have:
HTML signature code file ready (.html file)
Apple Mail completely closed (not just minimised)
Administrator access to your Mac
TextEdit application (pre-installed on all Macs)
If you already have signatures installed and wish to update them, skip to Phase 2.
Phase 1
Skip this phase if you are updating existing signatures
Phase 2
Phase 3
Phase 1: Create Placeholder Signature
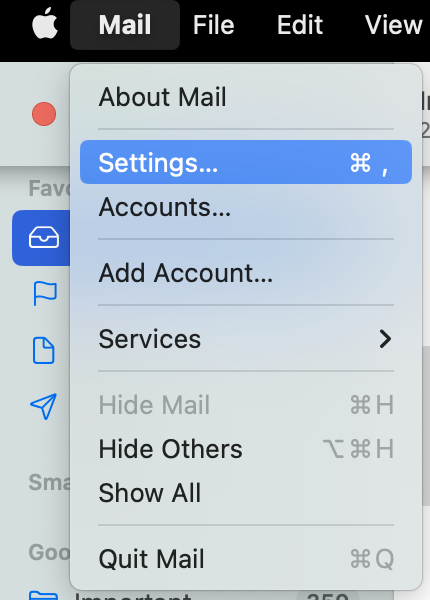
1. Open Apple Mail settings: Launch Apple Mail → Click "Mail" menu → Select "Settings" (or Preferences in older versions)
2. Navigate to the "Signatures" tab: Click the "+" button to create a new signature
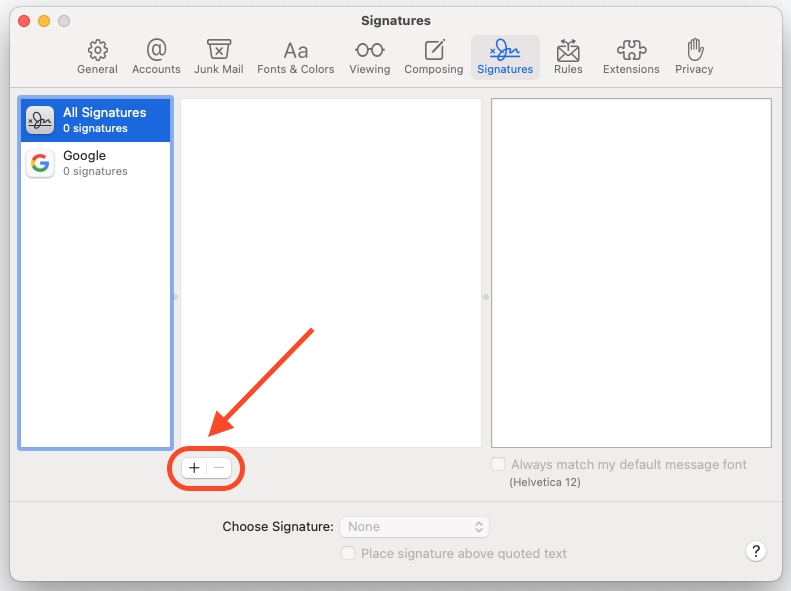
3. Configure a placeholder signature:
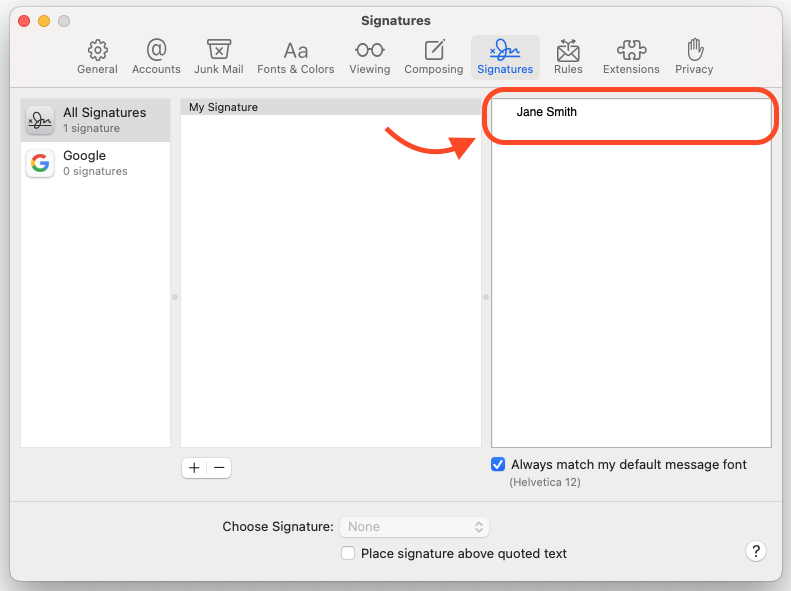
Name your signature (e.g., "Professional HTML Signature")
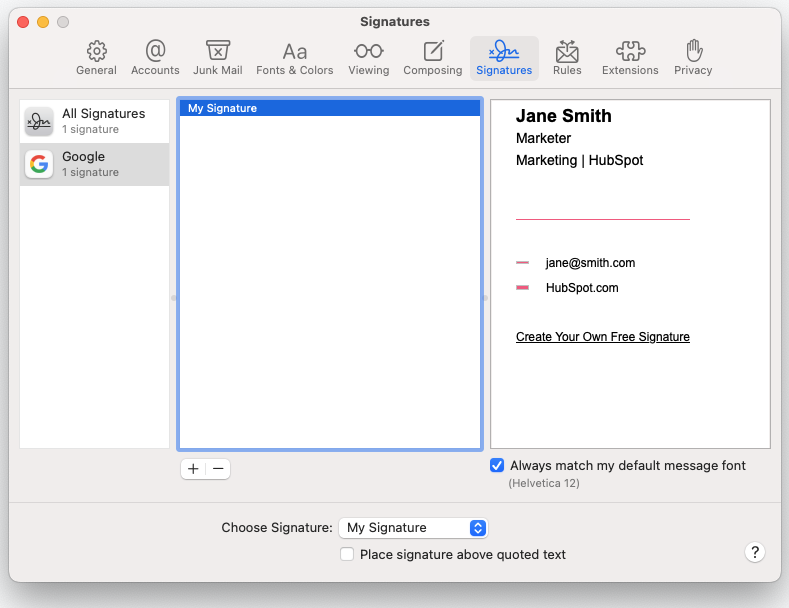
Type temporary placeholder text (e.g., "PLACEHOLDER")
4. Apply your signature: Drag your signature to the desired email account in left column and set as the default under "Choose Signature" dropdown
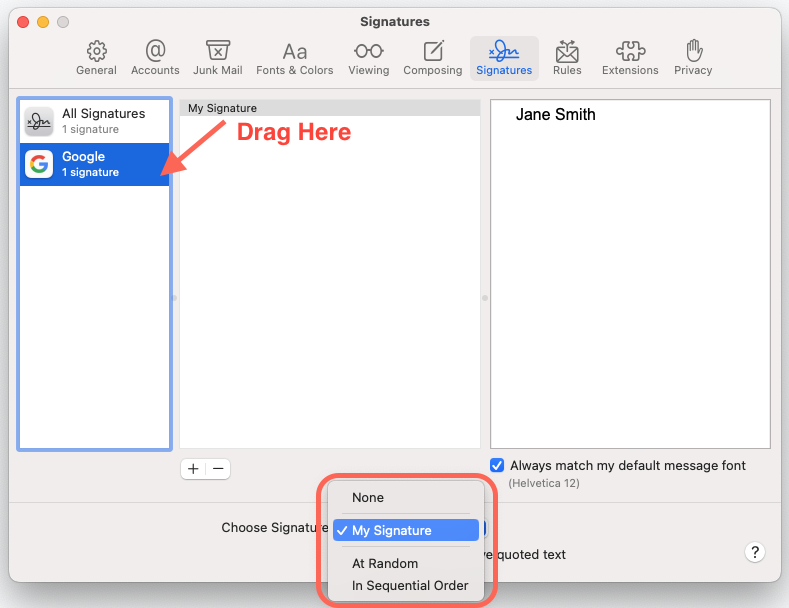
5. Save and exit Apple Mail: Close the Settings window and quit Apple Mail completely (CMD+Q). This action saves your signature file to the system library
Phase 2: Locate Signature File
6. Access the Mail library: Open Finder, then click Go → Go to Folder
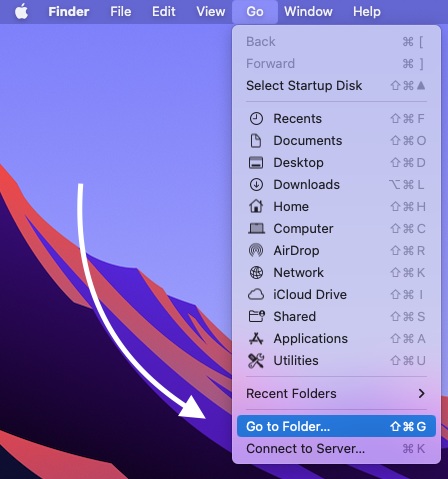

7. Navigate to the signatures folder: Type “~/Library/Mail” and click the “Go” button.
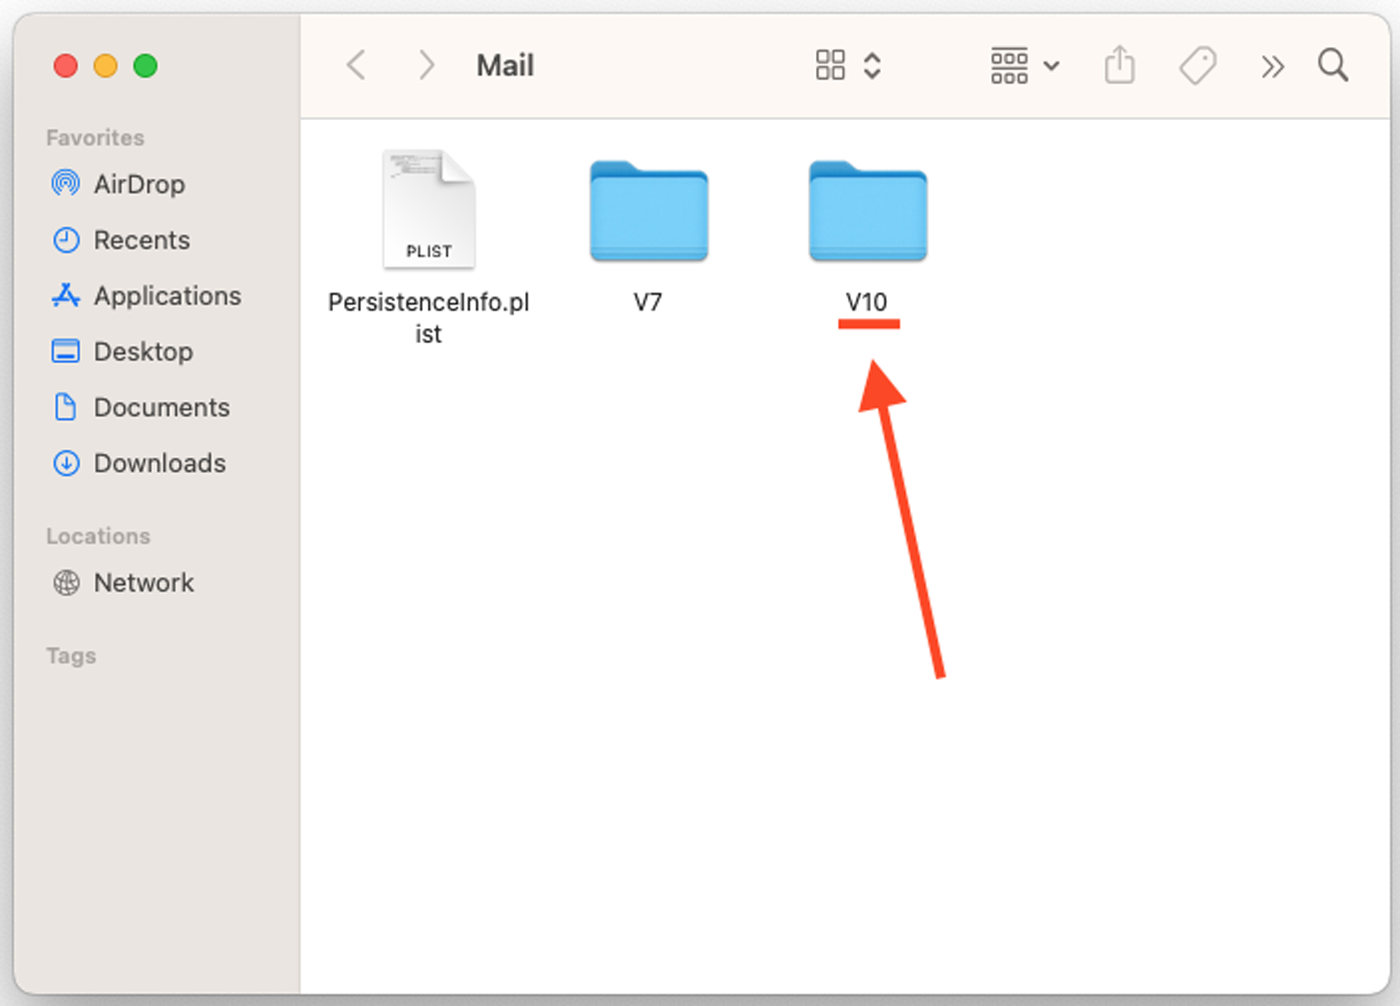
8. Locate the latest version folder: Open the folder starting with "V" followed by highest number (e.g., V10, V11)
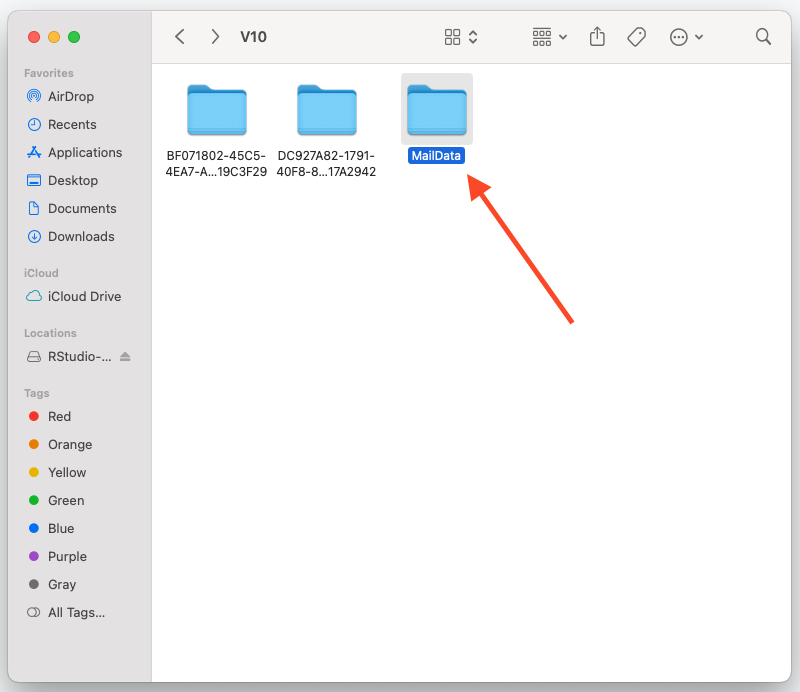
9. Enter the "MailData" folder
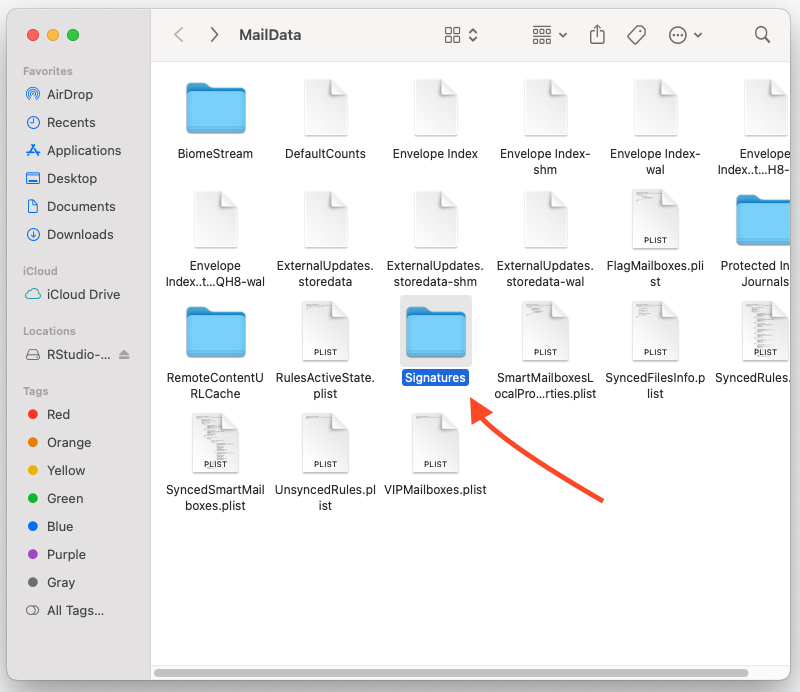
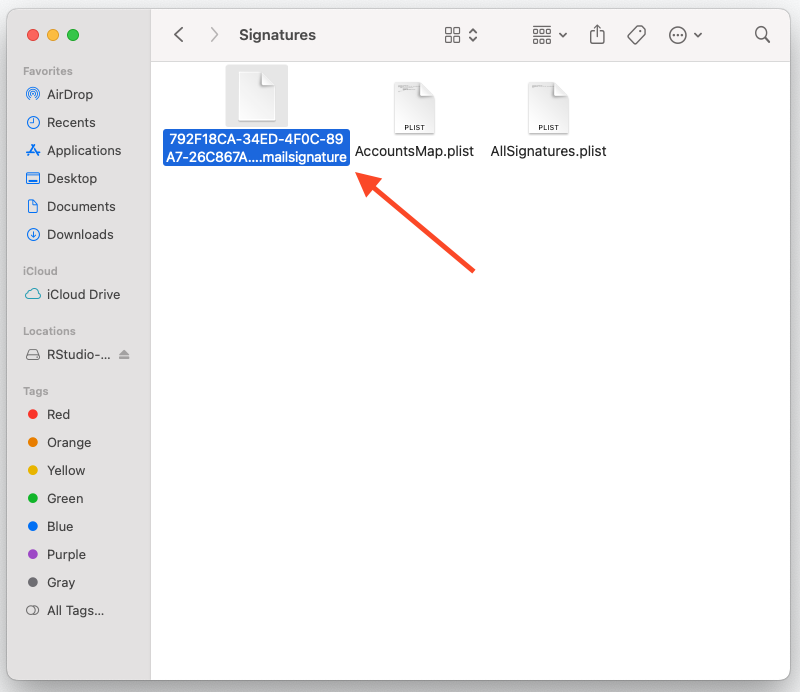
10. Open the "Signatures" folder
11. Identify your signature file: Sort by "Date Modified" to see the newest files and look for the file ending in .mailsignature.
If you have previously set up signatures, you may have multiple .mailsignature files in this folder. Go to step 12B for more info.
Phase 3: Replace with HTML Content
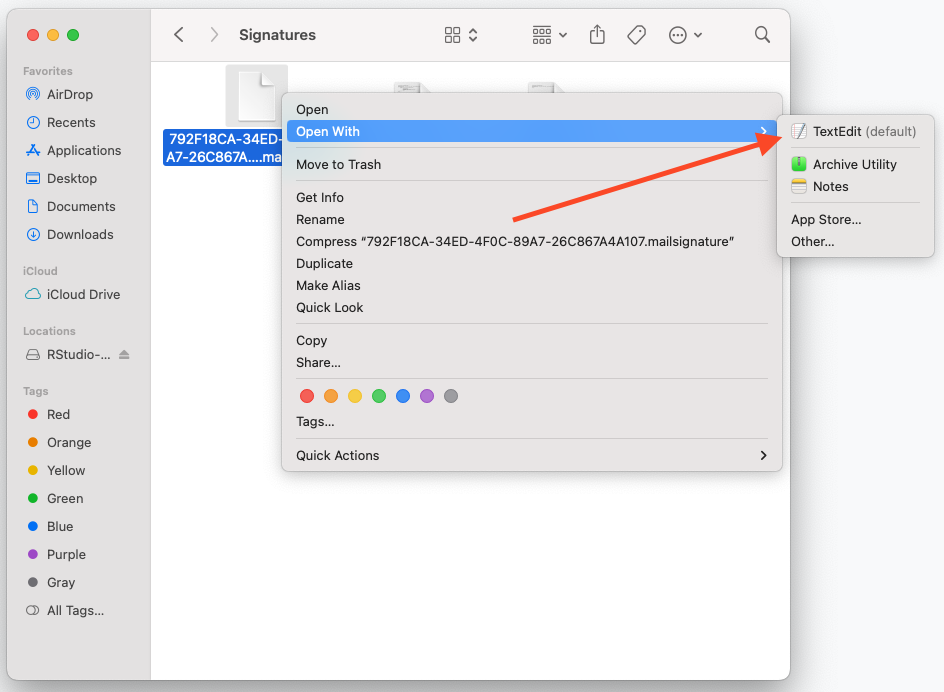
12A. Edit the signature file: Right-click the .mailsignature file and select "Open With" → "TextEdit"
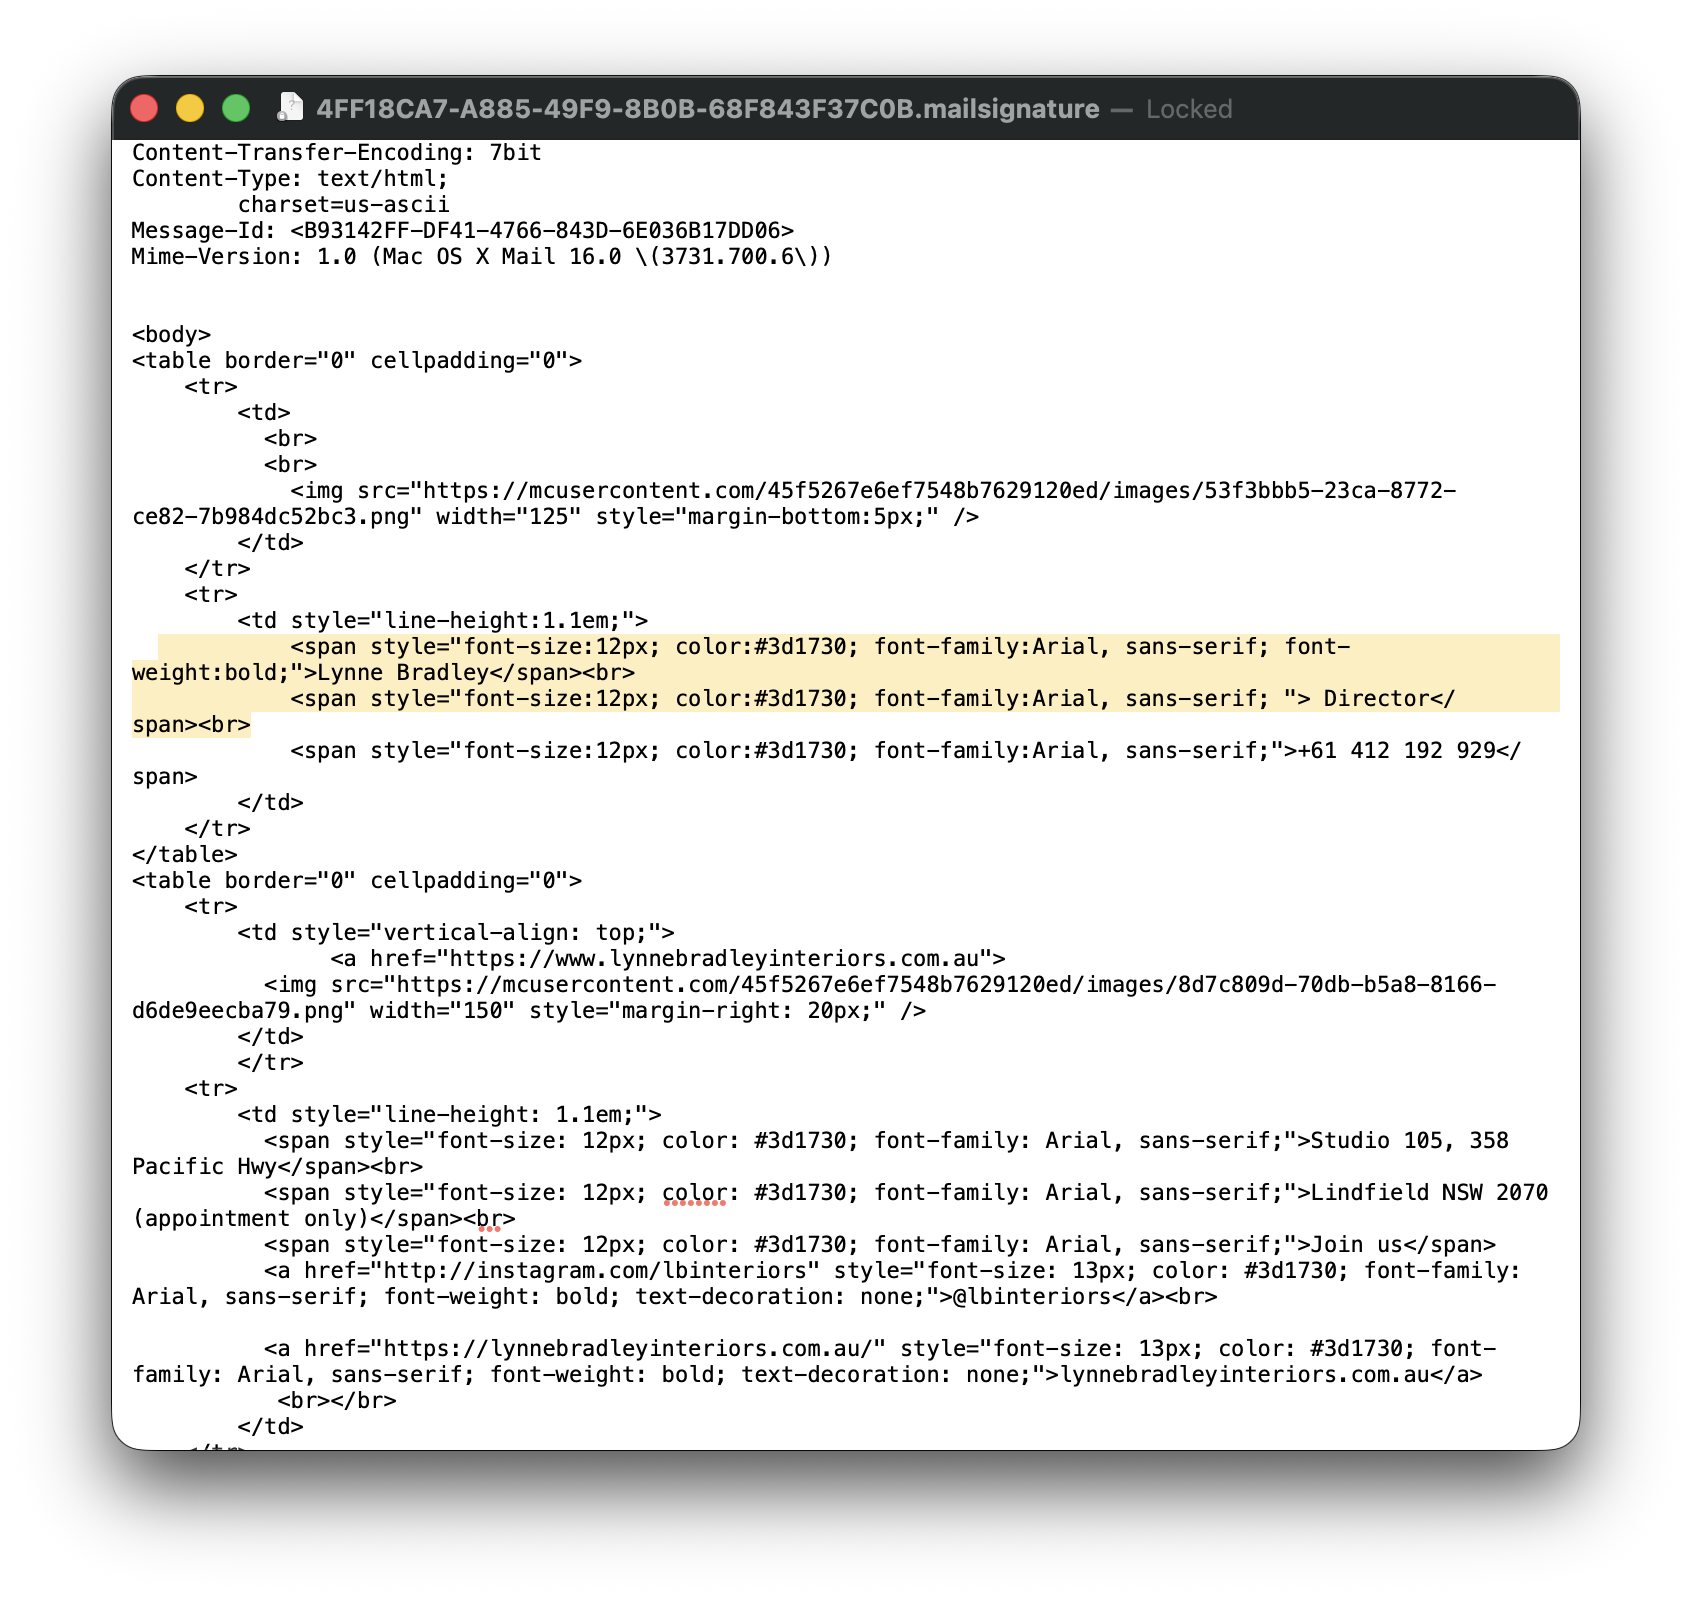
12B. Identify which signature file you wish to edit by opening the file in TextEdit and locating key details within the HTML content, such as the name and title (as highlighted below).
Take note of the beginning few letters of the filename so you can identify it later (“4FF…”).
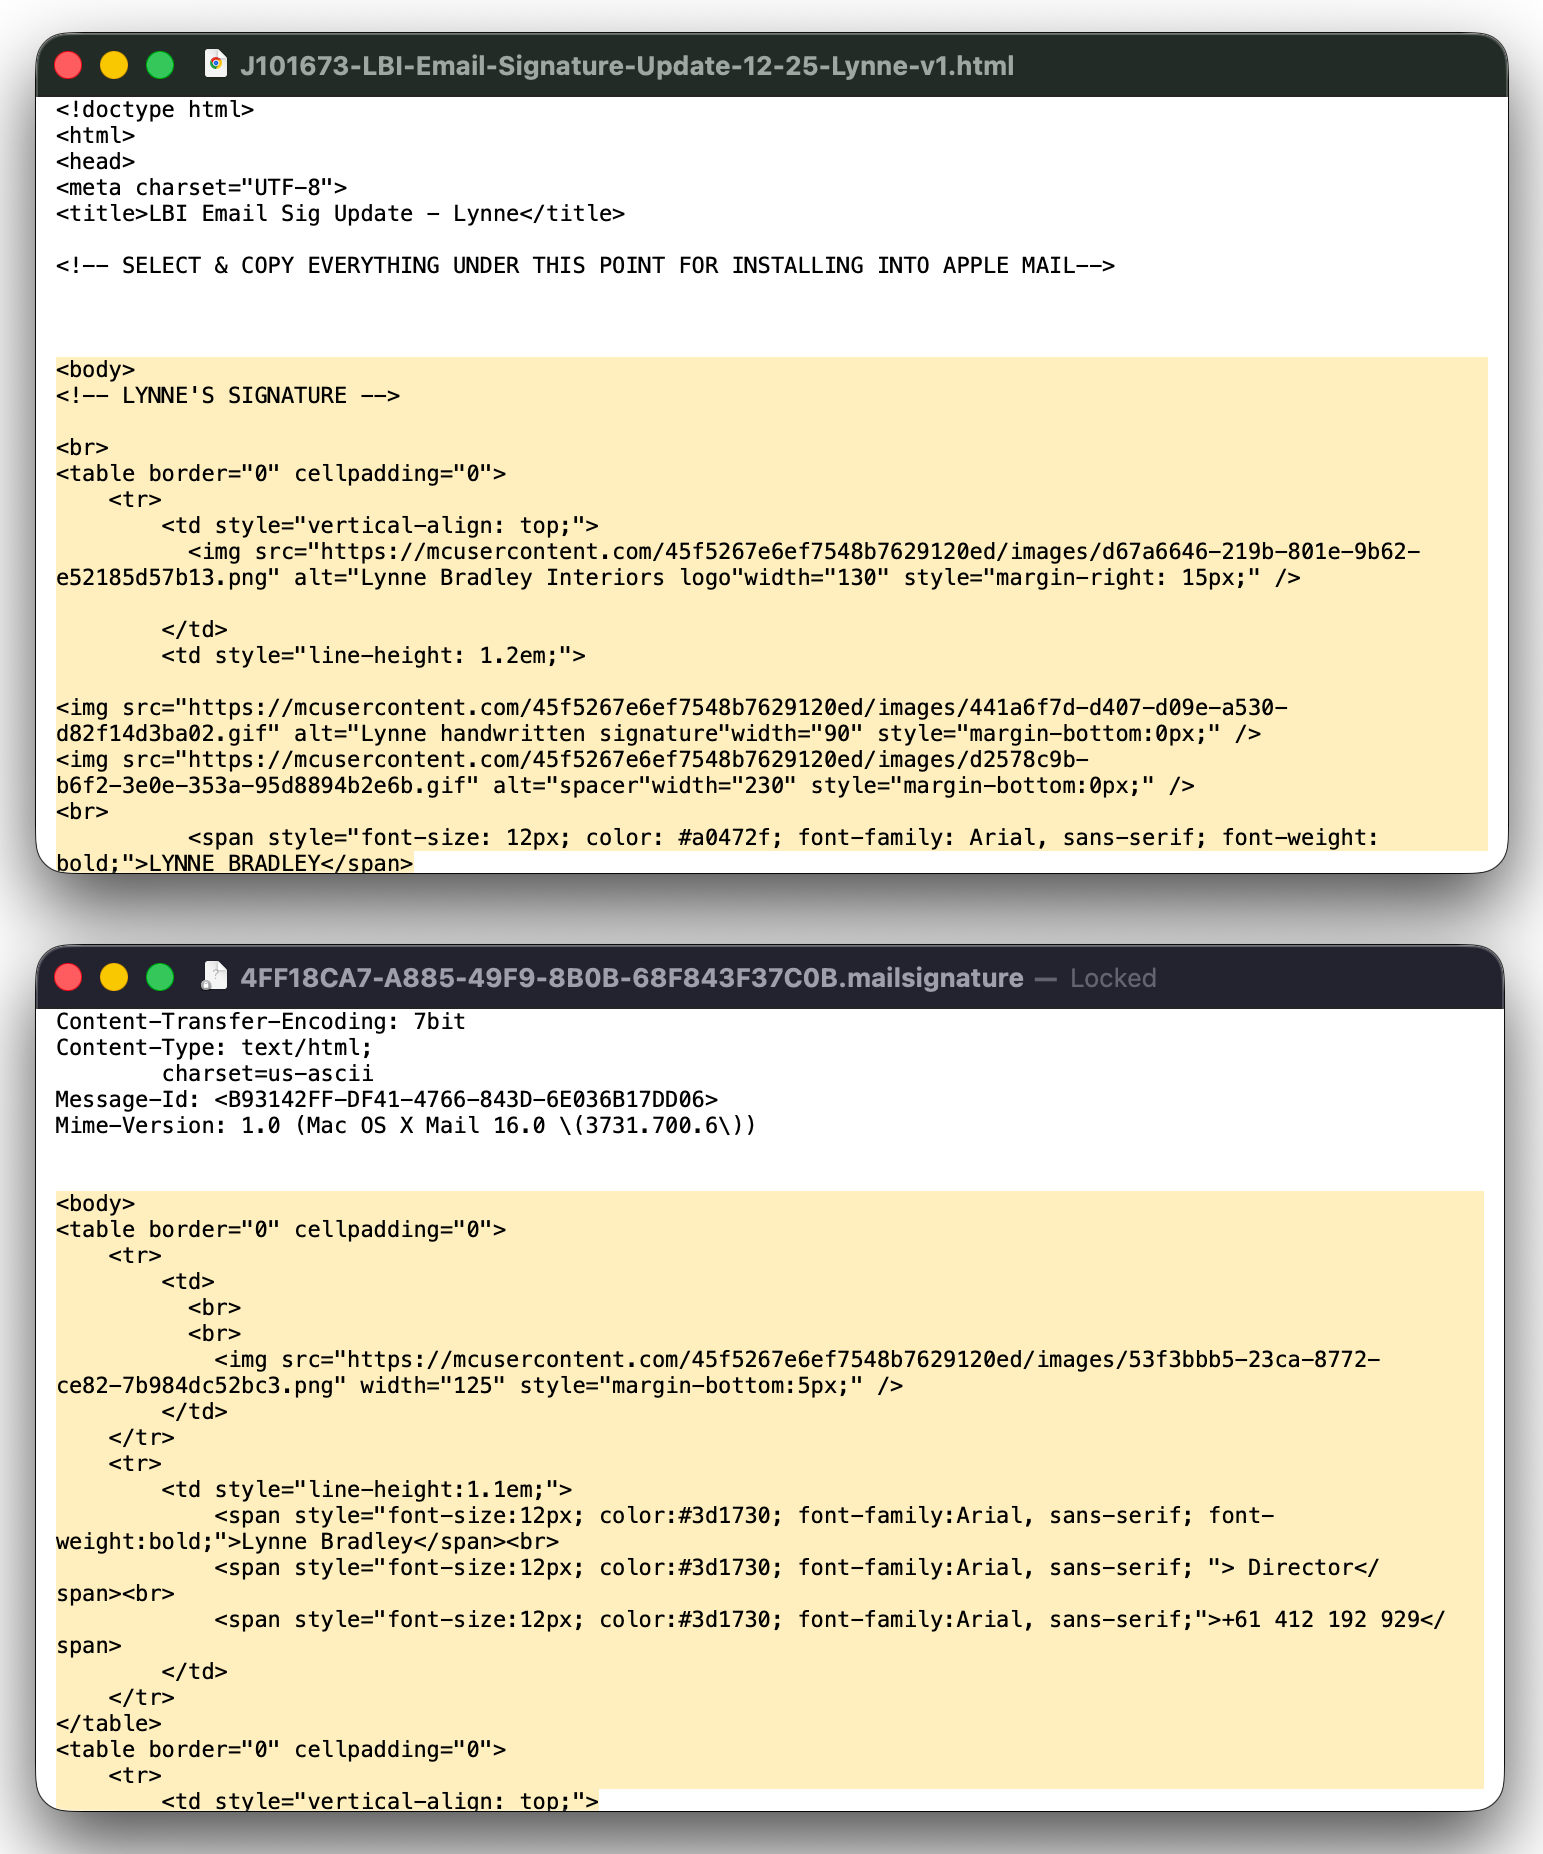
13. Insert HTML signature: Open your new HTML signature code in a separate TextEdit window so you are viewing both signature windows at the same time. The example below shows the new signature file followed by the ‘old’ or placeholder signature underneath.
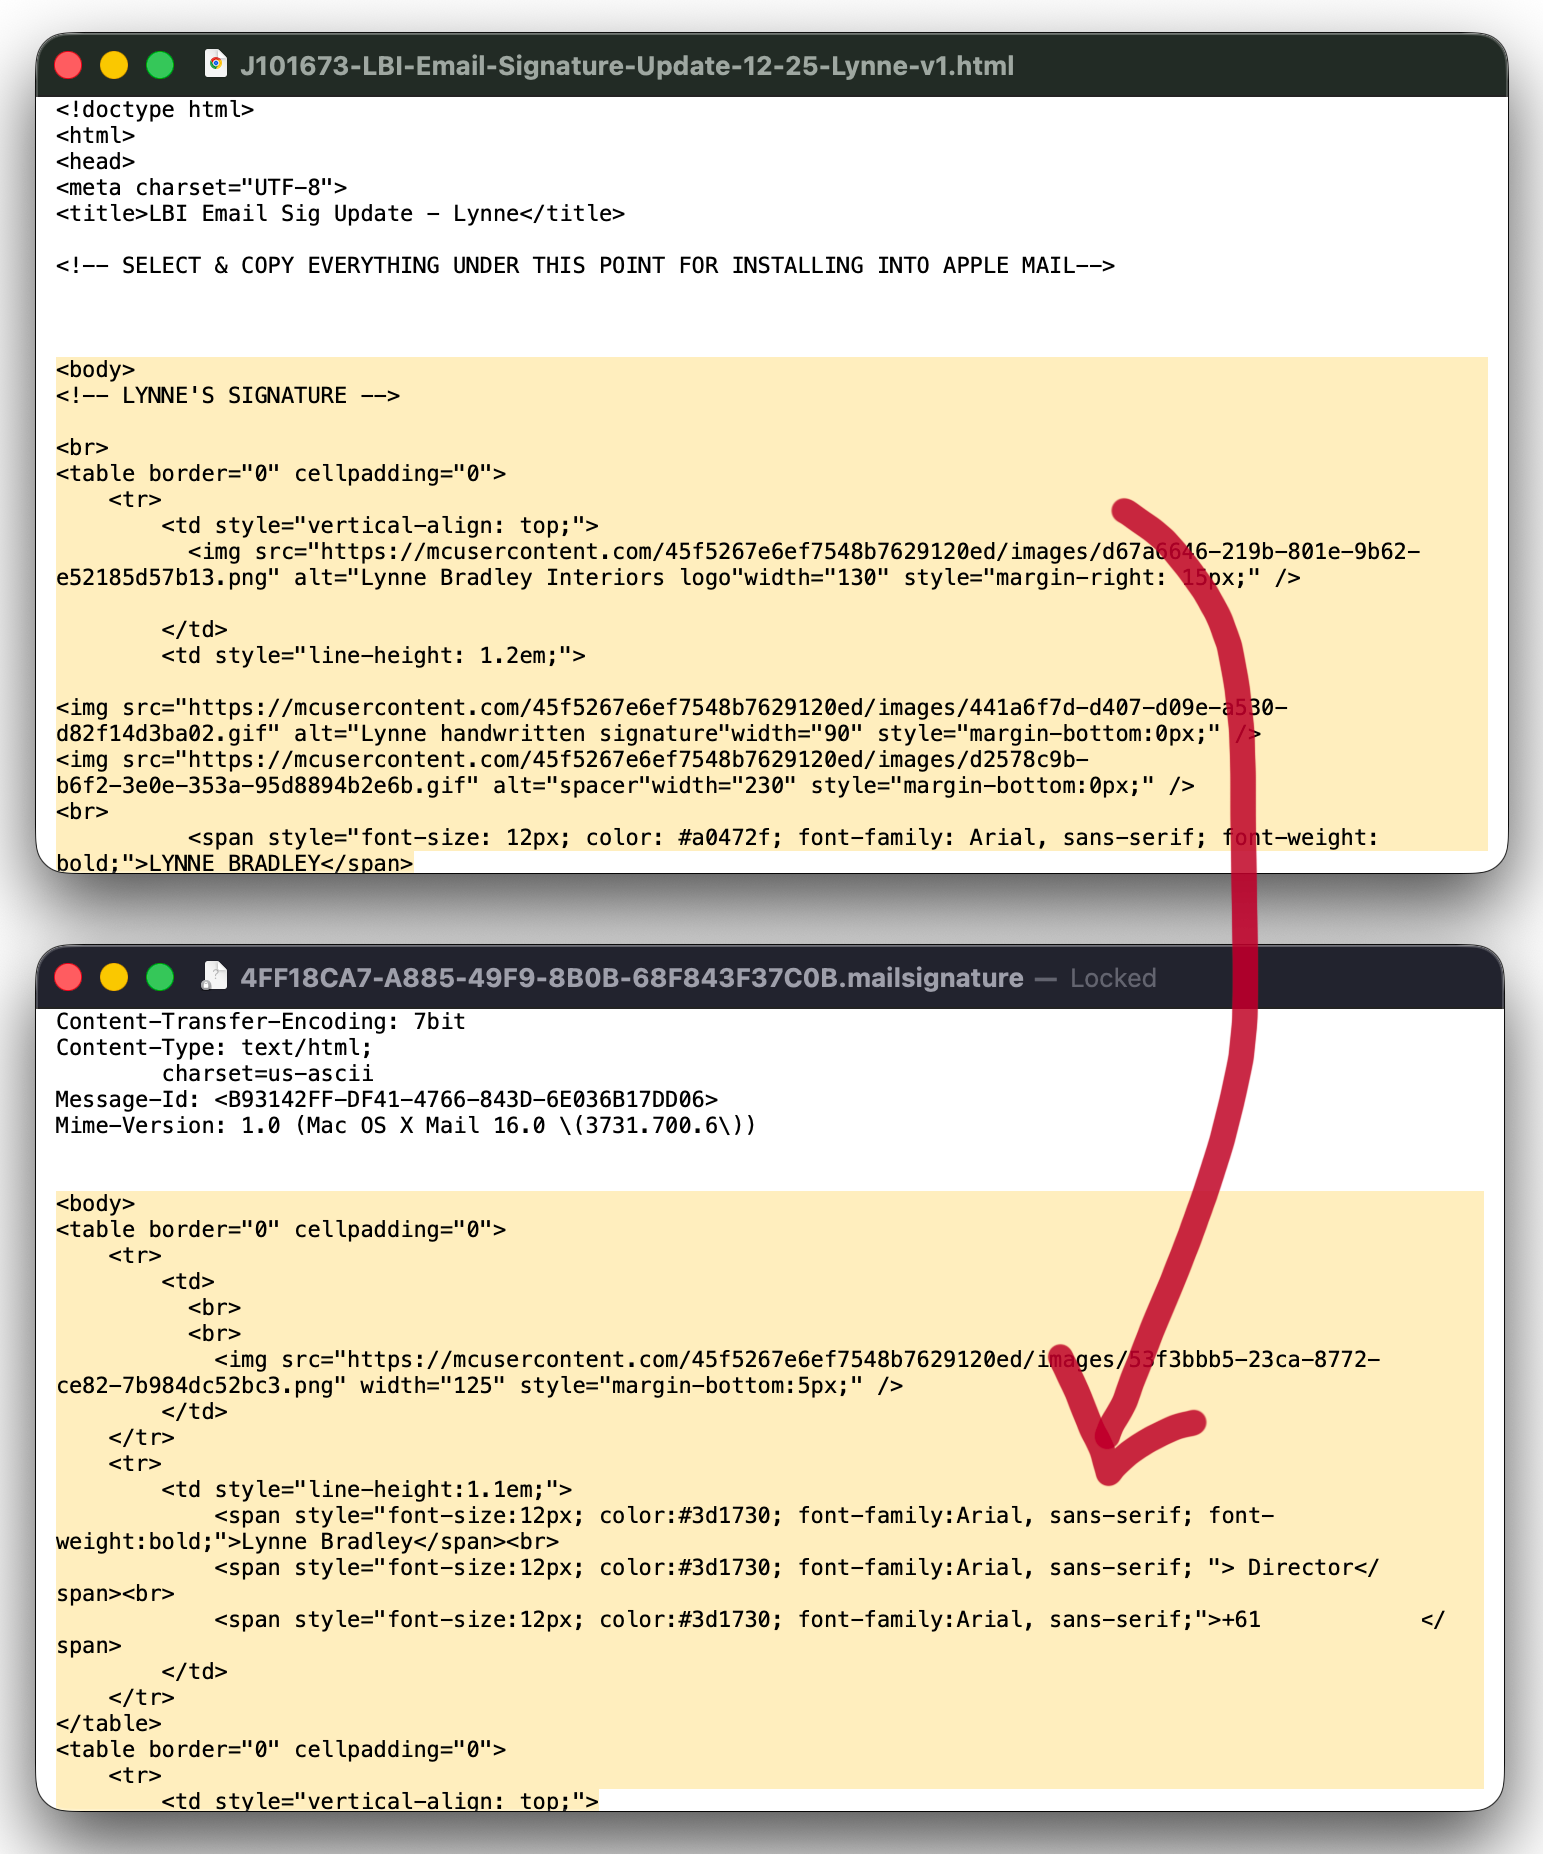
14. Replace body content: In the new signature (.html file), locate the <body> tag and select & copy everything from <body> to </body> and replace (paste) in your corresponding .mailsignature file (the ‘old’ or placeholder signature you set up).
Critical: Preserve all content above <body> tag
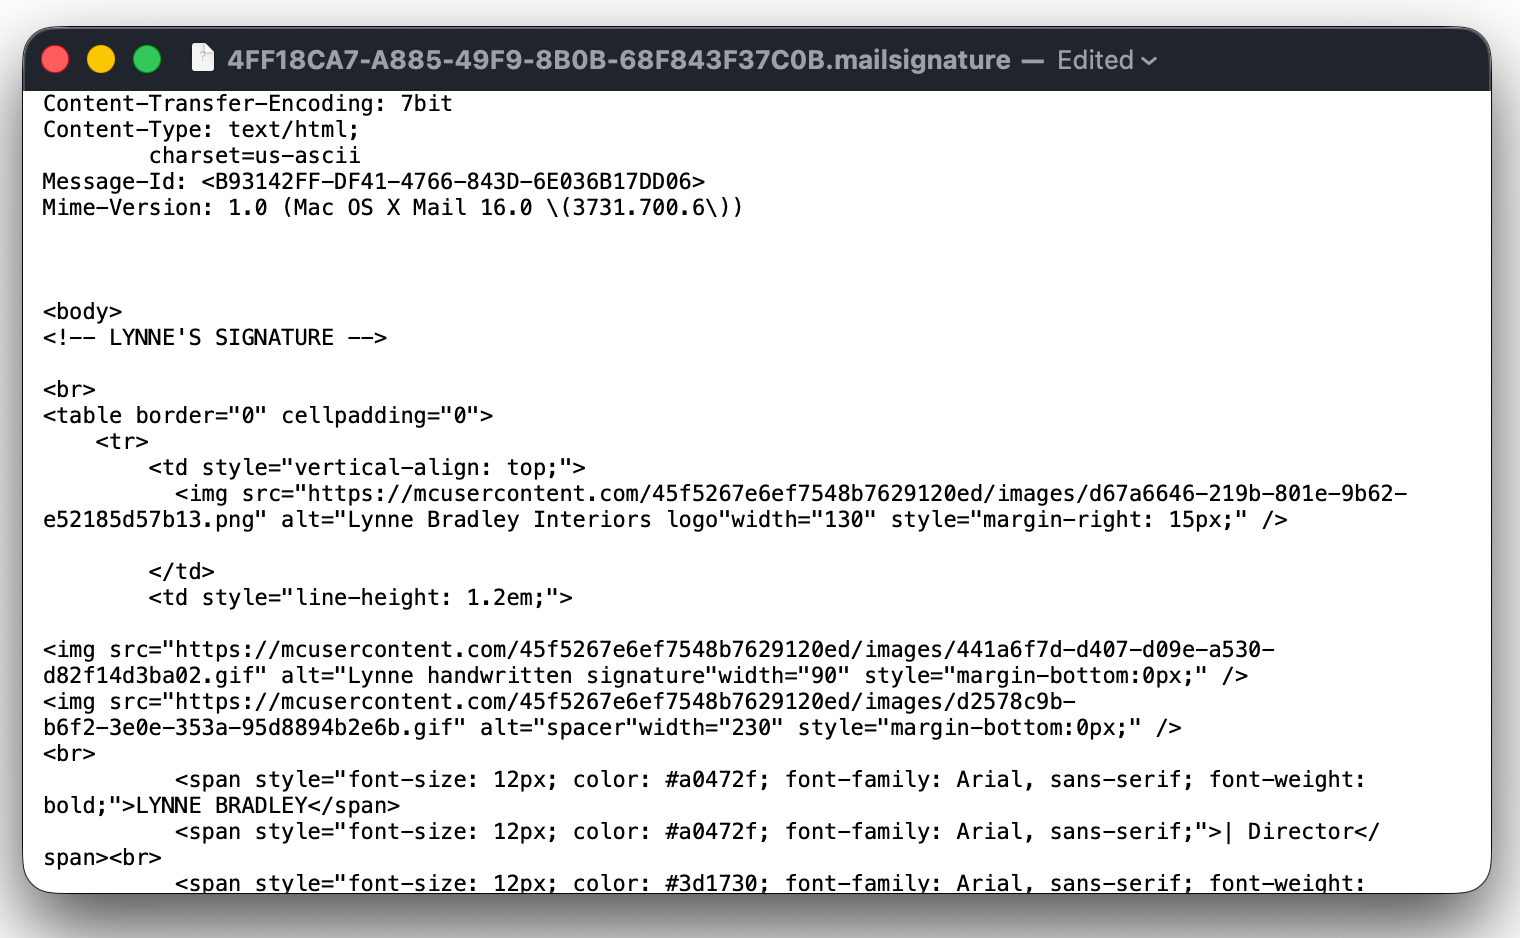
15. Confirm changes: After replacing the text, your signature should look like this.
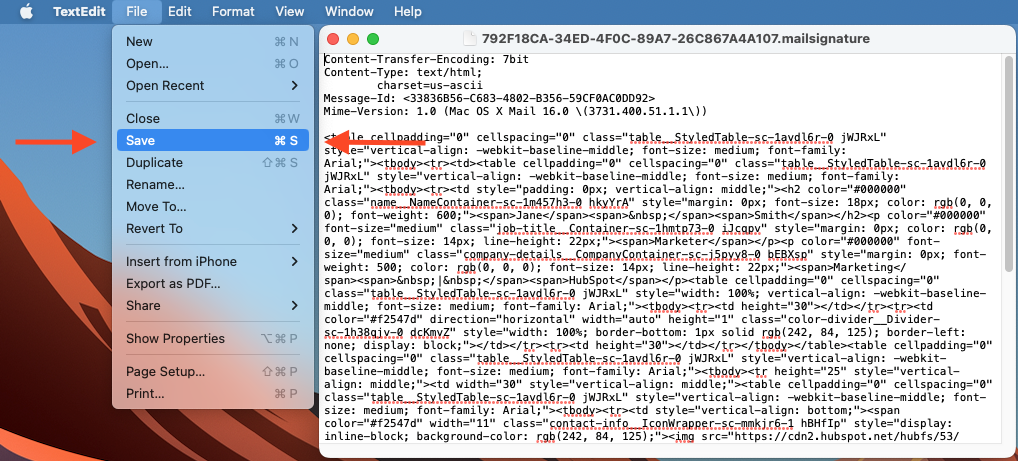
16. Save the file: Use CMD+S to save. If it asks you to ‘unlock’ the file upon saving, please do so. Then you’ll need to lock it again as outlined in the following steps.
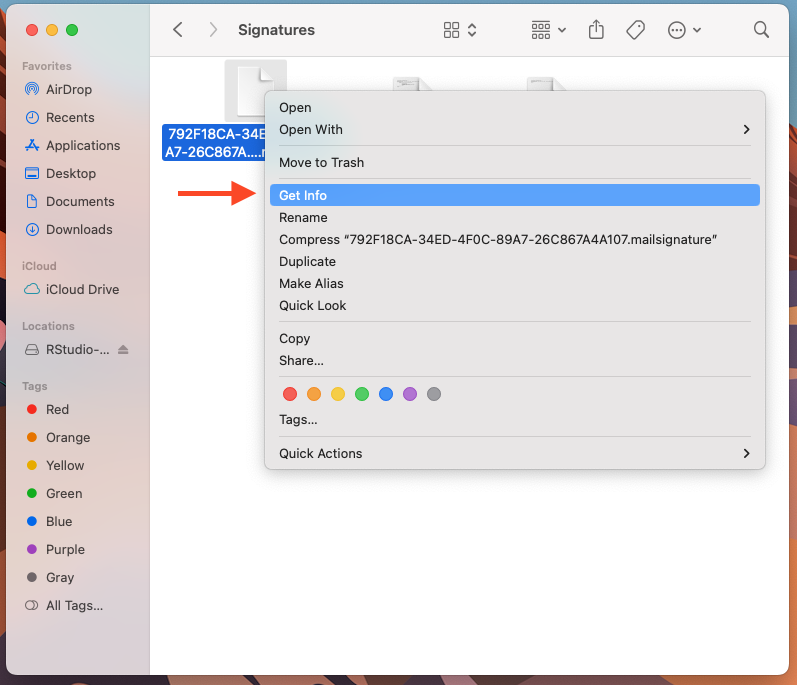
17. Lock the file: Right-click your signature file → "Get Info"
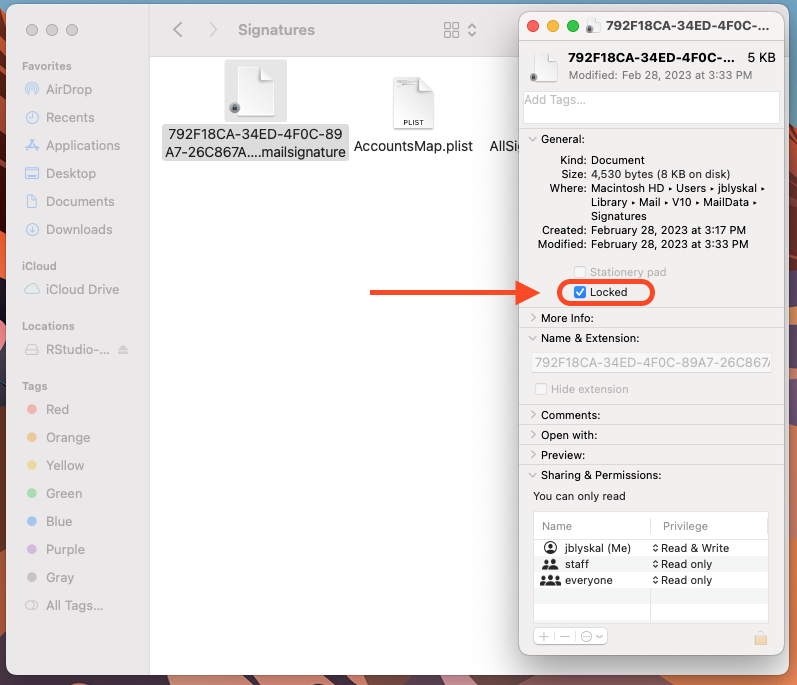
18. Check the “Locked" checkbox: This prevents Apple Mail from overwriting your HTML
19. Verify results: Open Apple Mail and navigate back to Signatures to verify the signature looks the way you want. Make sure Apple Mail is closed completely before you make the changes to the signature file.
Compose a new email to triple check the new signature is displaying correctly.
Repeat above steps to install multiple signatures, which can be assigned to different accounts within your Settings.
IMPORTANT: Never edit the content of your signatures directly into this Signatures section as it can throw the styling attributes out of whack. It will look fine in the edit window, but may display incorrectly at the recipients’ end.
Changes to your signatures must always be done through the HTML file and re-installed following these instructions.